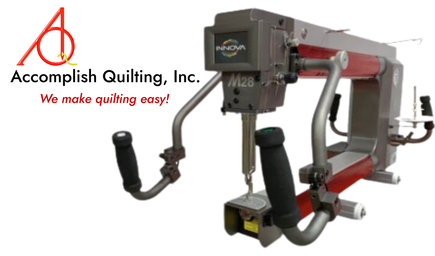
Adjusting the Tension on an Innova Quilting Machine
Here is our favorite video for learning how to adjust your tension. It's done by Michael Schwarzberger of ABM International. This is the same video that we feature on our Tech Tip page. Learn from the expert!
Keeping in mind that some folks like to watch videos, and other people like a written guide to follow -- we have developed written instructions based on this video. Feel free to read them here, or download them below.
Michael’s Method of Tension Adjustment for the Innova
Background
Components are adjusted on the top thread path to affect top thread tension and cause the top thread to pull the bobbin thread up and into the back of the quilt. These components are:
Prerequisites
Procedure
Background
Components are adjusted on the top thread path to affect top thread tension and cause the top thread to pull the bobbin thread up and into the back of the quilt. These components are:
- Pre-tension applies a very slight drag on the top thread such that it causes the top thread to bite into and turn the rotary tension wheel.
- Rotary Tension (main tension) applies consistent tensile stress or drag on the thread.
- Check Spring coils are turned to control the strength of the check spring.. Check Spring Strength is increased by using a screwdriver to turn the coils clockwise to the right.
- Beehive spring is located between the Rotary Tension adjustment knob and the Rotary Tension Wheel.
- Positioned just behind the Rotary Tension wheel is a slot in the chrome cylinder that the Check Spring travels in as it bounces up and down while the machine sews. When the Check Spring is up and against the top of the slot, we refer to that as being “against the spring stop”.
- When the Innova is properly threaded the thread passes over the Check Spring loop and then passes into the next thread guide. The top of this thread guide is at approximately the 9 0’clock position relative to the Rotary Tension Wheel. We call this “9 o’clock” for ease of communication and acknowledge that it is probably not exactly at 9 o’clock on the original series Innova machines and is more likely nearer 8 o’clock on the new M Series machines. That said, what we intend when we refer to 9 o’clock is that the thread is pulling the Check Spring loop our “U” down to the top of the guide down stream of the Check Spring.
Prerequisites
- Bobbin tension is adjusted such that when the bobbin thread is gently lifted upward, the bobbin stands up but does not lift upward. In this condition, a slight drag should be felt on the thread.
- The pre-tension knob has been tightened (rotated clockwise to the right) such that the screw stem in the middle of the knob is starting to protrude out of the knob. The position indicating mark on the knob should be set to point at 12 o’clock.
- Machine is threaded in accordance with the Innova Service Manual.
- If you do not have a Performance Tension with calibration mark on the knob, use a Sharpie, paint or piece of tape on the knurled standard tension adjustment knob to create a calibration mark.
Procedure
- Turn the Rotary Tension knob counterclockwise to the left as many turns as is necessary to fully decompress the “Beehive” spring.
- Insert a flat bladed screwdriver into the middle of the Rotary Tension knob and rotate the screwdriver counterclockwise until the Check Spring starts to travel downward in the chrome slot.
- Turn the screwdriver clockwise and pause when the Check Spring touches the top of the Chrome slot (against the spring stop).
- Grab the thread just before it enters the needle and pull some thread through the machine and observe the Check Spring.
- If the Check Spring moves downward, turn the screwdriver to the right the equivalent estimated distance of moving the minute hand on a clock 5-minutes.
- After each 5-minute adjustment, repeat steps 4 and 5 until the spring stays against the spring stop and does not move downward.
- Note the position of the calibration mark on the Rotary Tension Knob.
- Rotate the calibration mark clockwise to the right one complete revolution (tightening the tension)
- Pull on the thread and observe the Check Spring movement.
- Continue making full revolutions and pulling the thread in accordance with steps 8 and 9 until the Check Spring can be pulled down to the 9 o’clock position. This is your machines “starting tension”.
- Make a spiral shape and a couple of points while test sewing the machine on a quilt sandwich.
- If the bobbin thread looks flat on the back of the quilt, increase Check Spring Strength by 5 minutes and increase tension 1/2 -turn clockwise to the right.
- Repeat steps 11 and 12 until the bobbin thread is pulled up and into the back of the quilt. Ideally, the stitches on top of the quilt and back of the quilt should look nearly the same.
- If after adjustment it looks as if the bobbin thread is showing on the top side of the quilt and is pulling up on points making “eye lashes”, reduce tension ¼ to ½ turn of tension knob.
- Test sew again.
- If bobbin thread is still showing on top, reduce Check Spring Strength 5 minutes.
- Repeat steps 14 through 16 until a satisfactory stitch is achieved.
Call us at one of our locations!
Michigan 269-556-2552
Ohio 269-985-8023
Tennessee 615-756-9556
Florida 269-985-8434
Indianapolis 317-478-1422
